

Join on WhatsApp
Get the latest updates directly on WhatsApp – motivation, news & more!
 Join On WhatsApp
Saving seeds is a powerful practice that connects gardeners with their plants in a deeply sustainable and personal way. It allows you to carry your garden forward year after year, reducing your reliance on seed companies, preserving regional plant varieties, and creating crops better adapted to your local environment.
Whether you’re working with a balcony garden or managing a small homestead, learning how to collect and store seeds correctly is an invaluable step toward self-sufficiency, food security, and eco-friendly gardening.
In this comprehensive guide, we’ll break down everything you need to know about harvesting, cleaning, storing, and preserving seeds the right way.
Why Saving Seeds Is Worth It
Before we get into the “how,” let’s understand the “why.” Seed saving isn’t just practical—it’s powerful.
1. Sustainability: Reduce waste and grow your own food year after year.
2. Cost Savings: Buying fewer seed packets each season saves money.
3. Local Adaptation: Seeds saved from your garden are better suited to your soil and climate.
4. Biodiversity: Preserve heirloom and rare varieties that may not be available commercially.
5. Food Freedom: Build a personal seed bank and reduce dependence on supply chains.
6. Cultural Value: Many seeds are linked to family traditions or regional history—saving them is preserving heritage.
Understanding What Types of Plants to Save Seeds From
Not every plant is ideal for seed saving. Choosing the right types is key to getting reliable results.

Open-Pollinated Plants
These naturally reproduce via insects, wind, or self-pollination. They produce true-to-type offspring, making them ideal for seed saving.
Heirloom Varieties
These are open-pollinated plants with a traceable history, often passed down for generations. They’re genetically stable and consistent.
Hybrid Varieties (F1)
Hybrids are bred from two distinct parent lines. Seeds from these often produce unpredictable results. Not recommended for reliable seed saving.
Self-Pollinators
Examples: Tomatoes, Peas, Beans, Peppers
They fertilize themselves, minimizing cross-pollination risks. Perfect for beginners.
Cross-Pollinators
Examples: Corn, Squash, Cucumber, Broccoli
These can easily cross with nearby plants, which may produce mixed or undesired traits unless isolated carefully.
Step-by-Step Guide: How to Collect and Store Seeds
1. Choose the Best Plants
Start with healthy, productive plants. Avoid collecting seeds from diseased, weak, or off-type plants.
- Look for:
- Vigorous growth
- High yield
- Pest/disease resistance
- Desired taste or appearance
2. Harvesting Seeds – Based on Plant Type
Different plant types require different harvesting methods:
Dry-Seeded Plants (e.g., beans, lettuce, flowers)
- Wait for the seed pods to turn brown and brittle on the plant.
- Harvest on a dry day.
- Remove seeds and allow them to dry indoors on a screen or paper.
Wet-Seeded Plants (e.g., tomatoes, squash, cucumbers)
- Scoop seeds from fully ripe fruits.
- For tomatoes/cukes: Use fermentation (jar + water, 2–3 days). This removes the slimy coating.
- Rinse thoroughly and dry on a non-stick surface like parchment paper.
Biennial Crops (e.g., carrots, beets, cabbage)
- Require two seasons to flower.
- In year one, grow and store roots through winter.
- In year two, replant and let them go to seed.
- Harvest seeds once the flower heads dry and become brittle.
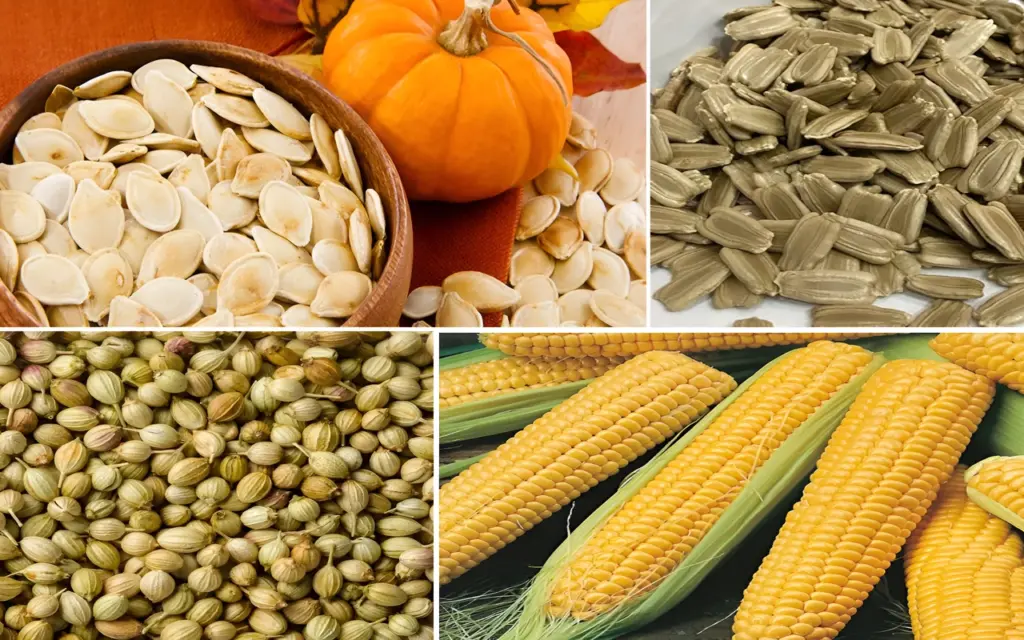
Large Crops (e.g., corn, sunflowers, melons)
- Corn: Let the ear dry completely on the stalk. Harvest once kernels are hard.
- Sunflowers: When heads droop and the back turns brown, cut and dry indoors.
- Melons/Pumpkins: Scoop mature seeds, rinse, and dry thoroughly.
3. Cleaning Seeds Properly
Proper cleaning prevents mold and improves storage life.
- Winnowing: Gently blow away lighter debris (chaff).
- Screening: Use fine mesh to separate seeds from plant matter.
- Rinsing: For wet seeds, ensure pulp is fully removed. Let them dry completely before storing.
4. Drying Seeds the Right Way
- Lay seeds in a single layer on a breathable surface (paper, mesh screen).
- Dry in a cool, shaded, well-ventilated place.
- Seeds should snap, not bend, when fully dry.
- Never use direct sunlight or ovens.
5. Storing Seeds for Maximum Shelf Life
Proper storage is essential for long-term viability.
- Use airtight containers: glass jars, sealed envelopes, or plastic vials.
- Label each with name, variety, and collection date.
- Store in a cool, dark, and dry environment (ideal: under 50°F and low humidity).
- For long-term storage, use a refrigerator or freezer with silica gel packets or rice to absorb moisture.
6. Testing Seed Viability
Before planting saved seeds, check how many will actually sprout:
- Dampen a paper towel and place 10 seeds on it.
- Roll it up and seal in a ziplock bag.
- Keep it in a warm spot for several days.
- Count how many seeds sprout.
→ 8 sprouts = 80% germination rate.
Under 70%? Plant more densely or replace the stock.
Bonus Tips for Seed-Saving Success
- Avoid Cross-Pollination: Use barriers like row covers or increase distance between varieties.
- Save in Bulk: Collect seeds from multiple plants to preserve genetic diversity.
- Label Clearly: Variety, harvest date, and any notes. Confusion leads to gardening surprises!
- Stay Dry: Moisture = mold = dead seeds. Always use dry storage and containers.
- Rotate Stock: Use older seeds first. Replenish yearly for better germination.
Common Mistakes to Avoid
- Saving from immature fruits or diseased plants
- Forgetting to label containers
- Storing seeds in plastic bags with no airflow or moisture control
- Assuming hybrid seeds will grow true
- Not isolating cross-pollinators, resulting in unexpected results
How to Build Your Own Seed Bank
Creating a personal seed bank is like building your own treasure chest for future harvests.

- Store multiple generations of seeds
- Trade with other gardeners
- Join seed libraries or co-ops
- Keep a seed journal—record what worked, what didn’t, and what adapted best
A well-managed seed bank is not just a backup—it’s a proactive step toward a resilient, personalized garden.
Final Thoughts
Learning how to collect and store seeds the right way isn’t just about frugality or convenience—it’s a practice rooted in environmental stewardship and long-term sustainability.
Start small. Save seeds from a favorite tomato, a flowering herb, or even a pumpkin. Over time, you’ll build a living collection of plants that are uniquely adapted to your soil, your climate, and your tastes.
With every seed you save, you’re planting more than just food—you’re planting a legacy.